Hook Lift Trucks: Matching Bin Size to Chassis Length and the Parts That Fail First
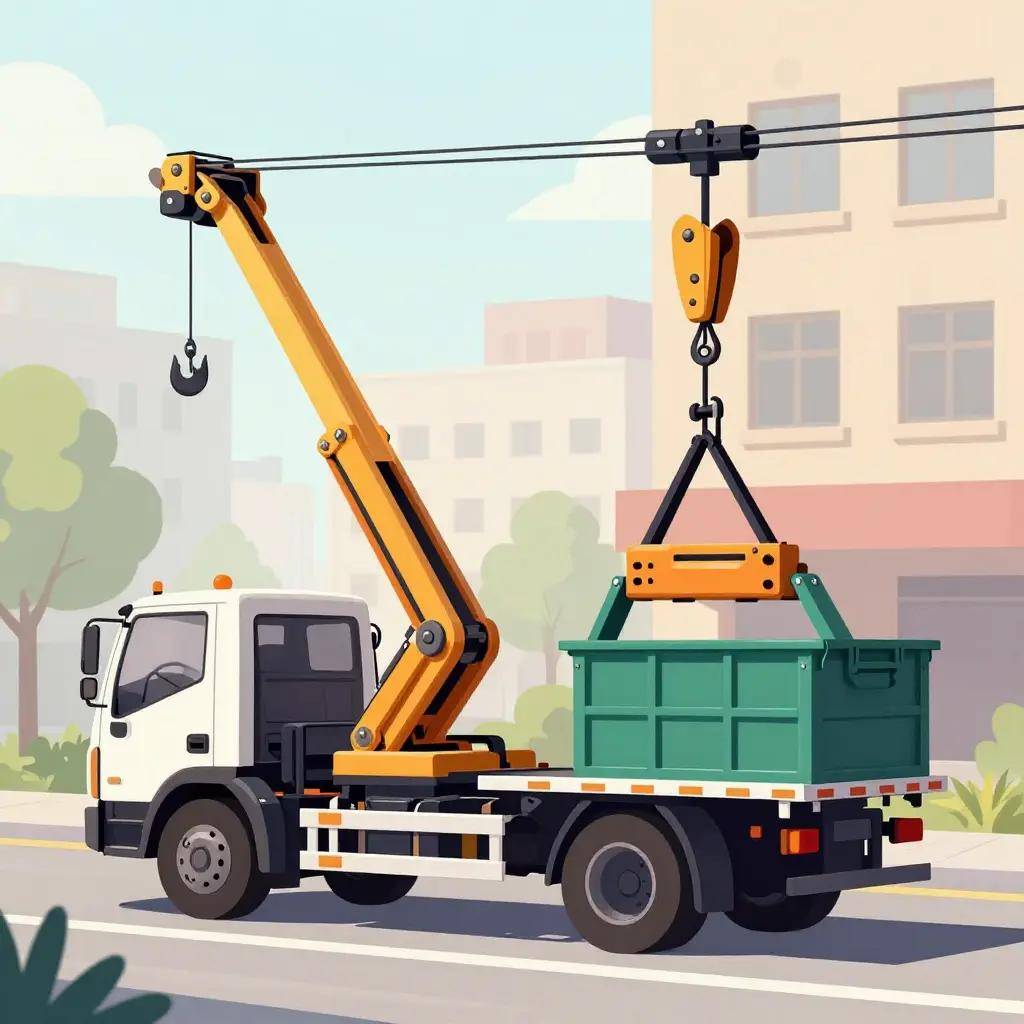
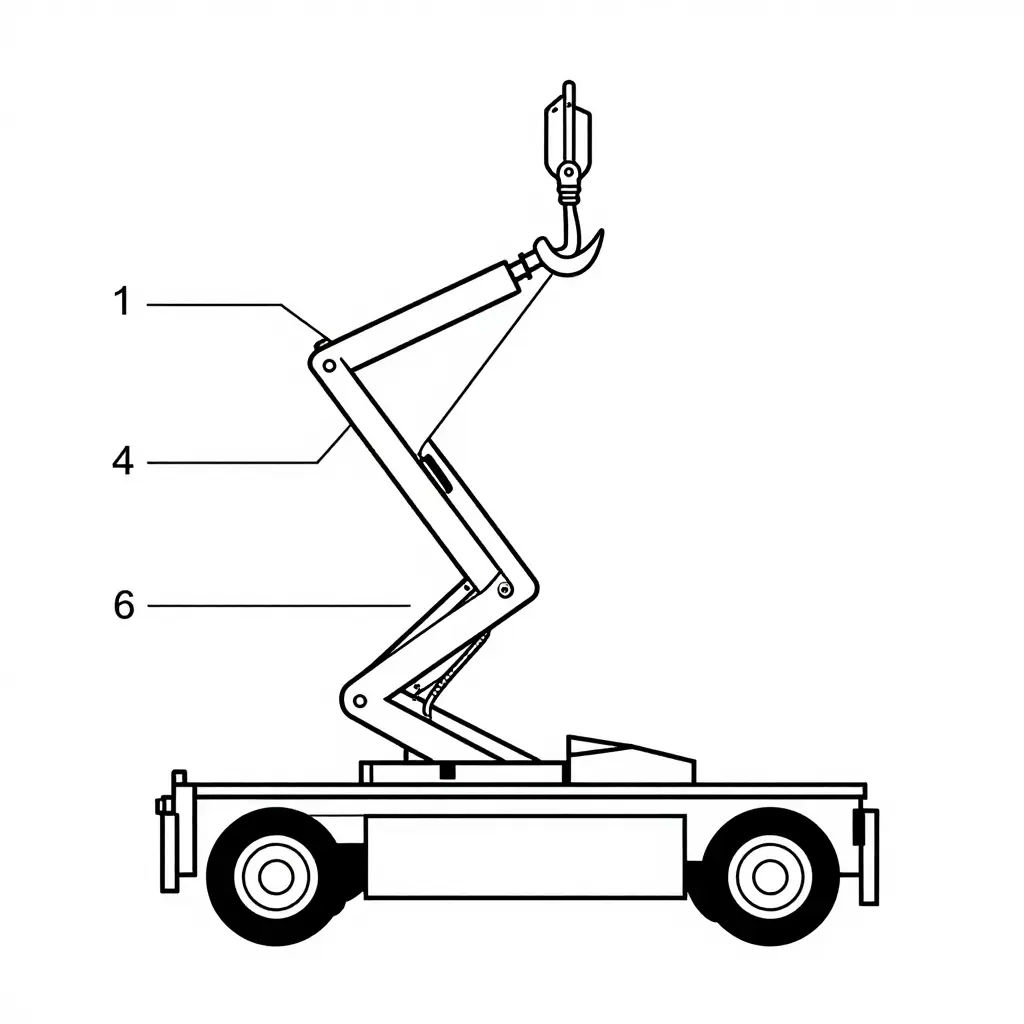
A hook lift truck loads, dumps, and drops containers with an articulated hydraulic hoist: a tilting subframe, a jib, and a hook that grabs the container’s lift bar. The arrangement works only when the container length fits the chassis cab-to-axle (CA) dimension and the hoist’s rated capacity. A bin that is too long moves the load center rearward, overloading the rear axle and lightening the steering axle; a bin that is too short wastes payload. Container length (commonly 12 to 22 ft), GVWR, hook height, dump angle, and rated lift capacity are the numbers that keep axle weight, stability, and cycle time within limits.
For fleets, waste haulers, construction companies, and repair shops, two decisions show up in uptime, safety, and operating cost: which container a chassis can carry, and which parts wear out first on daily routes.

Bin-to-Chassis Matching: A Step-by-Step Methodology for Hook Lift Trucks
Bin size and chassis length are the first specs to settle. Choose wrong and you either overload the hoist, drag the container on the pavement, or run lighter than the truck allows. Work through the steps in order to keep container handling safe, legal, and repeatable.
The Step-by-Step Matching Sequence
-
Confirm the chassis wheelbase and frame length. Measure the usable frame behind the cab plus the rear overhang. That length sets how far the hoist rails extend and where the rear roller sits under load. A longer wheelbase takes a longer bin but turns wider; a short frame limits you to compact containers.
-
Verify hoist capacity and hook height. Check the hoist’s rated lifting capacity (tonnage) and its hook height. The 54-inch hook height is the industry standard, with 36-inch and 61.75-inch (about 62-inch) versions also in use. The hook has to meet the container’s hook bar squarely, or every lift shock-loads the pivot pins.
-
Check the maximum container length the hoist can tilt and dump. Review the tilt angle and dump geometry. A hoist rated for 20-foot bins may physically mount a 22-foot container but fail to tilt it fully, leaving debris stuck inside and stressing the cylinder.
-
Account for bin weight against rated lifting capacity. Add empty bin weight to the payload and compare the total to the hoist rating, not to the chassis GVWR alone. A 33,000-lb hoist paired with a 4,000-lb bin still leaves roughly 29,000 lb for contents.
-
Validate ground clearance and stability. Confirm the loaded container clears the rear tires and frame rails, and that rear axle load stays within limits. Test on level ground first, then loaded, before committing to a full route.
Common Matching Errors to Avoid
- Equating bin volume with bin weight, since a large light container can still overload the hoist.
- Ignoring hook height mismatch between the hoist and the container hook bar.
- Treating chassis GVWR as the lifting limit instead of the hoist rating.
- Skipping a loaded ground-clearance check before daily deployment.
- Assuming one bin standard fits every truck in a mixed fleet.
Chassis-to-Bin Compatibility Reference
Use the matrix below to cross-check a hoist chassis against available container sizes and rated lift capacity. The values reflect typical North American hook lift configurations and assume the hoist, subframe, and container are all rated for the same duty class. Confirm the hoist manufacturer’s rated capacity and the body’s rated gross weight before pairing a bin with a chassis.
| Chassis Class / GVWR (lb) | Wheelbase Range (in) | Maximum Container Length | Typical Hoist Capacity (lb) | Operational Notes |
|---|---|---|---|---|
| Class 5-6 / 19,500-26,000 | 120-160 | 10-12 ft | 12,000-16,000 | Single-axle light duty; residential and yard waste. Steep rail angles limit dense loads; keep bin volume matched to low payload. |
| Class 7 / 26,000-33,000 | 140-180 | 14-16 ft | 20,000-24,000 | Versatile mid-size chassis; common roll-off replacement platform. Watch rear overhang and tail swing at full bin extension. |
| Class 7-8 / 33,000-40,000 | 160-200 | 16-18 ft | 25,000-33,000 | Construction debris and C&D. Verify axle, tire, and spring ratings under a loaded 16 ft container before dispatch. |
| Class 8 tandem / 54,000-66,000 | 200-240 | 18-22 ft | 40,000-50,000 | Heavy C&D, scrap, and demolition. Payload headroom depends on container empty weight; account for long-body moment on the rear axle. |
| Class 8 tandem/tri-axle / 66,000-80,000 | 220-260 | 20-24 ft | 50,000-65,000 | High-volume heavy hauling. Confirm frame rail reinforcement and bridge-legal axle spacing before sizing the bin. |
Reading the matrix: the maximum container length is set by hoist rail length and chassis wheelbase, while hoist capacity is the primary limit on what that container can legally and safely carry. A longer bin on a shorter wheelbase shifts weight rearward and reduces steering-axle load, so match wheelbase to container before selecting the hoist rating. Where a route mixes light and heavy bins, size the chassis for the heaviest container it will ever lift, not the average.
Compatibility Matrix Tradeoffs
The table below maps bin volume against usable hook lift truck chassis length. Start with the “Optimal” diagonal: those are the matched configurations, where bin body, hook height, and container rail all sit inside the geometry the hoist was engineered for.
| Bin Size (yd³) | Short chassis (84-108 in) | Mid chassis (120-138 in) | Long chassis (156-180 in) |
|---|---|---|---|
| 10-12 | Optimal | Under-sized | Under-sized |
| 15-20 | Over-sized | Optimal | Under-sized |
| 25-30 | Not recommended | Over-sized | Optimal |
| 40+ | Not feasible | Not recommended | Optimal |
Over-sizing: the stress penalty
A long bin on a short chassis works against the geometry. Put a 25-yard body on a 108-inch frame and the loaded center of gravity moves behind the rear axle, so the hoist cylinder, pivot pins, and chassis frame rails carry bending moments they were never specified for. Each dump cycle then loads the subframe and rear suspension unevenly, which accelerates fatigue cracking near the hoist mounts and shortens body-mount hardware life.
Under-sizing: the efficiency penalty
Under-sizing trades stress for wasted capacity. A 10-yard container on a 156-inch chassis hauls far less refuse per trip while burning the same fuel and logging the same drive time, so payload-per-mile and cost-per-ton both suffer.
Why it matters on daily routes
A matched configuration keeps the hoist, chassis, and bin inside their rated envelope, which is what protects the parts that fail first on daily routes: hydraulic cylinders, pivot bushings, and rear frame rails. Over-sized bins push those parts toward premature failure; under-sized bins quietly erode hauling margins. For a fleet running repeat routes, matching bin size to chassis length is a reliability decision that drives uptime and repair cost.
Which Hook Lift Components Fail First?
Daily service produces a predictable wear pattern. The chart below ranks the major components by failure frequency on daily routes, measured in repairs per 100 trucks per year, with hydraulic cylinders and seals highest at 34.
[bar-chart-component-failure-frequency]
Hydraulic cylinders top the list because every lift, dump, and lower cycle strokes them under full load, and rod seals take the brunt of grit, moisture, and heat cycling. The hook and latch assembly is next: constant engagement with bin bars wears the hook throat and the safety-latch spring. Hoses and fittings follow, as flexing at the pivot points works the reinforcement layers until a pinhole becomes a roadside leak.
Lower down, the control valve and wiring harness fail less often, usually as intermittent electrical faults rather than hard mechanical breaks. Roller and slide pads wear gradually and give warning through noise and bin misalignment long before they fail outright. Chassis frame and mounts come last because, when properly specified for the bin size and cycle duty, they outlast everything else on the truck.
Cylinders, the hook assembly, and hoses account for the majority of unplanned downtime. Build the preventive maintenance schedule around those three rather than treating every component equally.
The Parts That Fail First on Hook Lift Trucks Running Daily Routes

A hook lift truck that runs the same route five or six days a week executes dozens of load, lift, and dump cycles every shift. That repetition turns a handful of parts into predictable wear items, and they fail in a fairly consistent order. The components below are the ones fleet managers should watch most closely, ranked by how often they fail on high-cycle routes.
Hydraulic Cylinders and Seals
The telescopic lift and tilt cylinders carry the entire weight of a loaded bin, so they lead the failure list. Under frequent cycling, rod seals and wiper seals lose elasticity, while the cylinder bore and rod develop scoring and pitting. Early symptoms are slow lift, a drifting bin that creeps down under load, and hydraulic fluid weeping past the rod gland, often called hydraulic cylinder wear. Overloaded bins and fast, harsh cycling accelerate this by pushing pressures past the relief setting and generating heat that cooks the seals.
Hook and Latch (Pivot) Assembly
The hook, latch, and pivot pins take the shock of every engagement and release. Constant impact deforms the hook throat, wears the pivot bushings oval, and rounds the latch locking shoulder. Symptoms include a bin that clunks or hangs loose, a latch that will not stay engaged, and visible metal shavings under the hook. Mismatched bin-to-chassis configurations make it worse, because a hook that does not sit squarely on the bar loads one edge and chews through components fast.
Hydraulic Hoses and Fittings
Flexing hoses at bulkhead and swivel fittings work-harden and eventually crack. Ruptured lines and weeping JIC or ORFS fittings show up as oily wet spots and pressure drop. Vibration, abrasion against the frame, and high pump pressures accelerate the damage.
Roller and Slide Wear Pads
The subframe rollers and slide pads guide the bin on and off. Grit, gravel, and constant rolling contact flat-spot the rollers and grind the pads thin, producing a gritty scrape and jerky travel. Harsh route conditions and misaligned rails multiply the wear.
Control Valve and Electrical Wiring
The control valve spools, solenoids, and the dash/joystick wiring endure thousands of actuations. Symptoms include sluggish or sticking spools, intermittent lever response, and a bin that will not hold position. Chafed wiring and corroded connectors from road salt and vibration make electrical faults common.
Chassis Frame Mounts and Bushings
Finally, the subframe mounts and rubber bushings absorb the torque of every lift. Worn bushings let the body shift, causing cracking at the mounting plates and loose, wandering handling. Overloading and rough, unpaved routes finish these off quickly.
Failure Frequency at a Glance
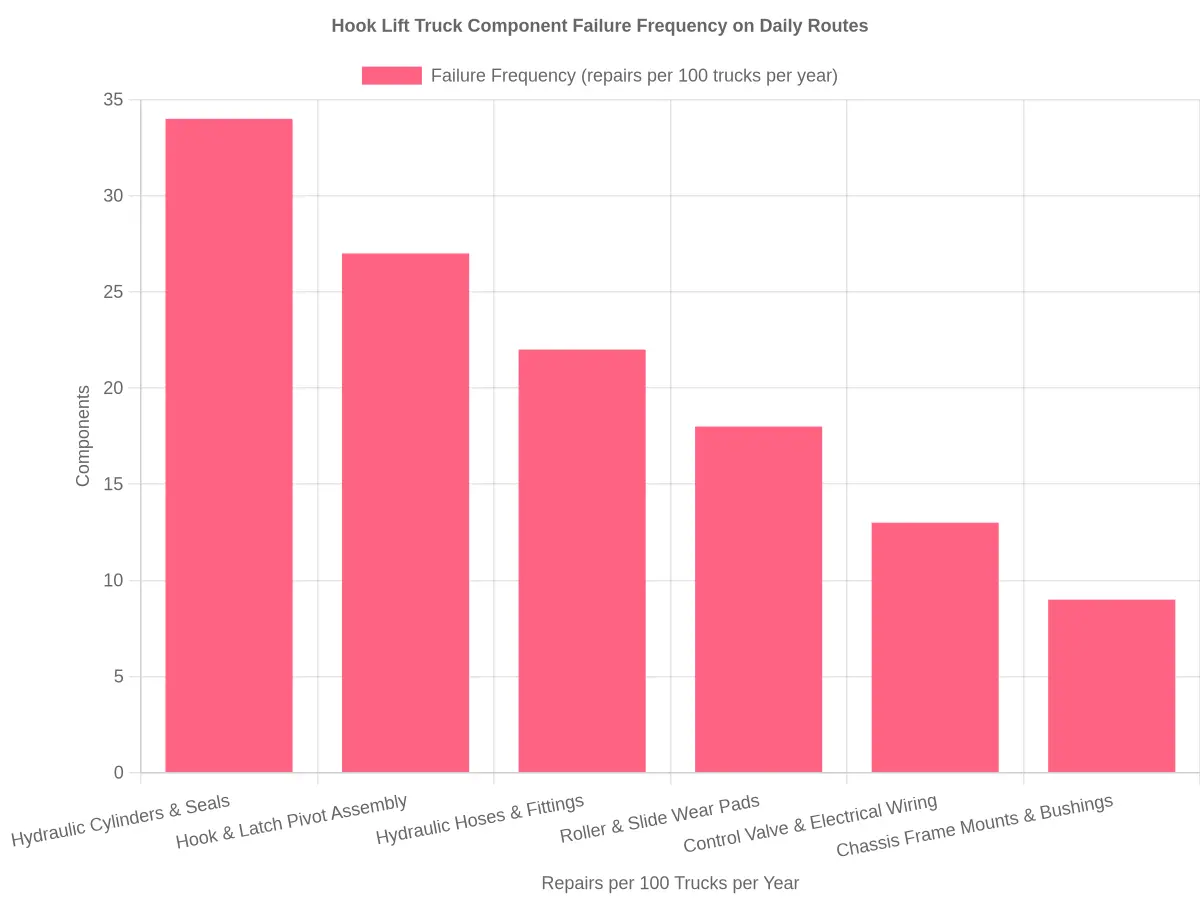
The failure frequency bar chart above sets the maintenance priorities. Hydraulic cylinders and seals fail most often, at 34 repairs per 100 trucks per year, followed by the hook and latch pivot assembly at 27 and hoses and fittings at 22. Roller and slide wear pads, control valve and electrical wiring, and chassis frame mounts round out the list.
| Rank | Component | Repairs per 100 Trucks/Year |
|---|---|---|
| 1 | Hydraulic cylinders & seals | 34 |
| 2 | Hook & latch pivot assembly | 27 |
| 3 | Hydraulic hoses & fittings | 22 |
| 4 | Roller & slide wear pads | 18 |
| 5 | Control valve & electrical wiring | 13 |
| 6 | Chassis frame mounts & bushings | 9 |
Build a preventive inspection plan around cylinders, seals, and the hook assembly first, then monitor hoses, pads, controls, and mounts on a fixed interval. Overloaded bins, mismatched bin-to-chassis pairings, and harsh route conditions are what push these parts past their expected service life.
Preventive Maintenance and Inspection: Keeping Hook Lift Trucks Route-Ready
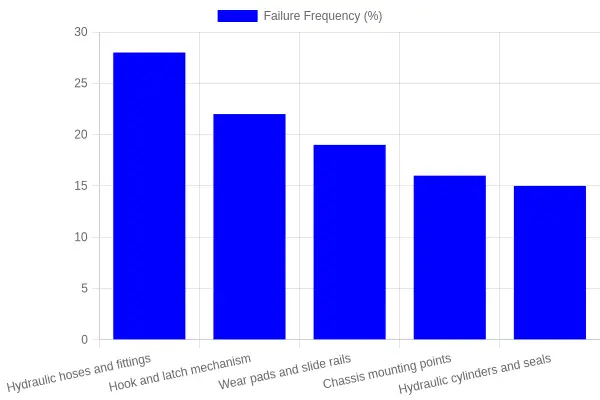
A hook lift truck is only as reliable as the parts that wear first on daily routes. For fleet managers and heavy-duty repair shops, the goal is not faster reactive repair but a disciplined inspection cadence that catches fatigue before it becomes a roadside breakdown. The chart below shows where failures concentrate across typical waste-hauling and construction duty cycles, and it should shape how you allocate wrench time.
Daily, Weekly, and Monthly Inspection Schedule
The following cadence targets the components that fail first: hydraulics, the hook and latch mechanism, wear pads, fittings, and chassis mounting points.
| Component | Daily | Weekly | Monthly |
|---|---|---|---|
| Hydraulic system (hoses, tank, fluid) | Check fluid level; look for leaks or weeping fittings | Inspect hoses for chafing, cracks, and heat damage | Fluid analysis; replace filter; verify relief-valve pressure |
| Hook and latch mechanism | Visual check of hook wear and latch engagement | Lubricate latch pivot; confirm safety-lock travel | Measure hook throat wear; inspect for cracking |
| Wear pads and slide rails | Listen for metal-on-metal noise during dump | Check pad thickness and rail scarring | Replace pads at wear limit; re-torque rail fasteners |
| Fittings and connections | Look for seepage at JIC and O-ring fittings | Snug fittings to spec; inspect for corrosion | Torque audit of all high-pressure connections |
| Chassis mounting points | Walk-around for loose hardware | Check mounting bolts and crossmember integrity | Torque to spec; inspect frame rails for stress cracks |
Daily Checks
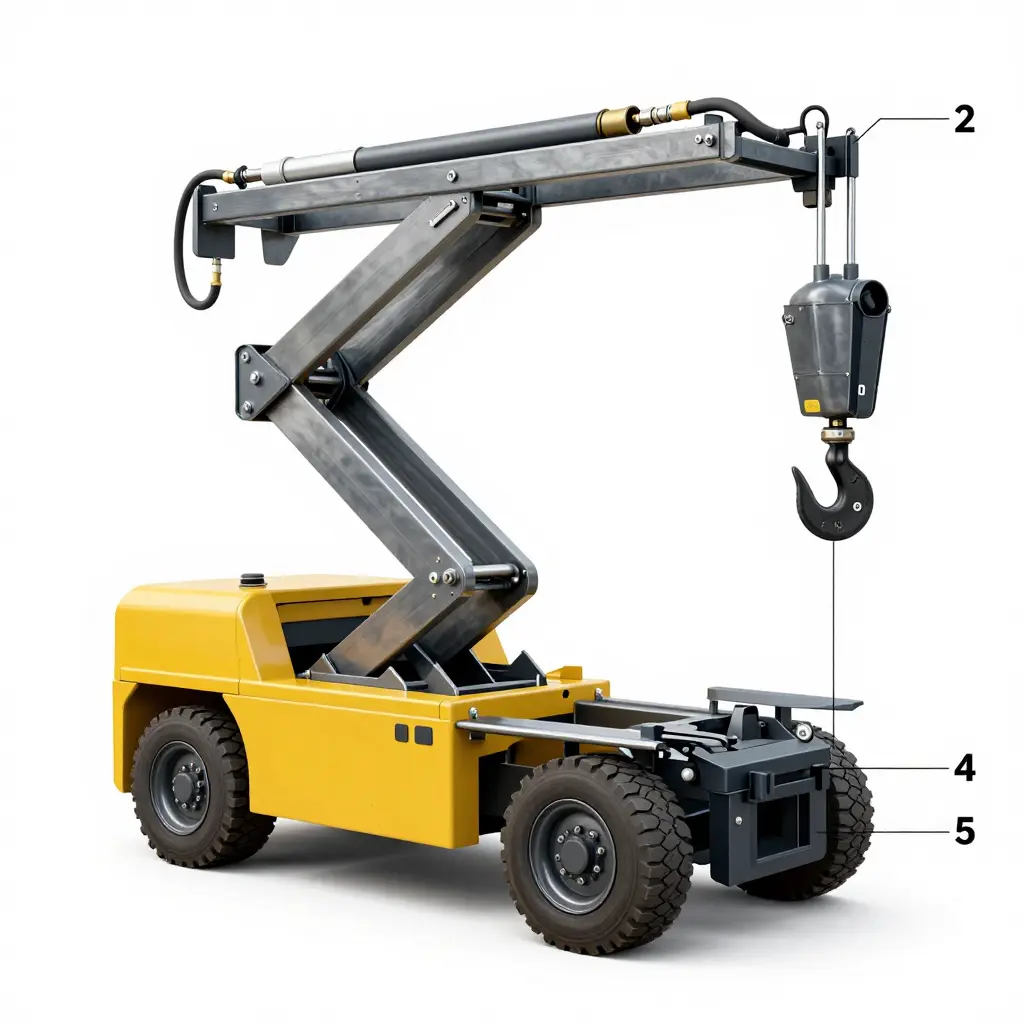
Before the first pickup, look for hydraulic leaks, confirm the latch fully seats, and check for fresh scarring on the slide rails. Two minutes of walking around the truck is cheaper than the downtime it prevents.
Weekly Checks
Lubricate the latch pivot, inspect hose routing for chafing against the frame, and confirm wear-pad thickness stays within spec. Chafed hoses and thin pads are the leading precursors to field failure.
Monthly Checks
Perform torque audits on fittings and chassis mounting bolts, measure hook throat wear, and send hydraulic fluid for analysis. Catching fastener stretch and fluid contamination early protects the cylinders and pump.
Why Bin-to-Chassis Matching Extends Component Life
Matching bin size to chassis length is a specification choice that shows up in maintenance costs. An oversized bin makes the mast, hook, and wear pads work harder on every lift, accelerating fatigue and misaligning the latch. A correctly matched combination distributes load evenly, keeps the hook centered, and reduces premature failure of both hydraulics and frame hardware.
Durable hoist and chassis components, such as those engineered under an established manufacturing quality system, hold tolerance through thousands of cycles and make that inspection cadence easier to keep. For shops servicing fleets, pairing build quality with the schedule above is the most cost-effective way to keep trucks earning.
Hook Lift Truck Failure Diagnosis Quick-Reference
Keep this table in the cab or shop binder for daily-route troubleshooting. It covers the components that fail first on high-cycle hook lift trucks and gives crews a fast path from symptom to action.
| Component | Common Failure Symptom | Likely Cause | Recommended Action |
|---|---|---|---|
| Hydraulic cylinders (lift, tilt, boom) | Slow or jerky stroke, drifting under load, fluid weeping at the rod seal | Worn rod or piston seals, scored/pitted rod, bent cylinder rod, internal bypass | Inspect rod for scoring and pitting; reseal or replace cylinder; verify rod straightness; cycle full stroke to test for internal bypass |
| Hook and latch assembly | Bin will not lock down, latch fails to engage or release, bin slips or rattles in transit | Worn hook profile, stretched or broken latch spring, bent latch arm, pivot seizing, hook misalignment | Measure hook wear against spec and replace if undersized; swap broken springs; lubricate pivots; realign hook and latch |
| Hydraulic hoses and fittings | Weeping or spraying at fittings, bulging or cracked hose, chafing against frame, sudden pressure loss | Aged rubber, abrasion, loose or failed JIC/ORFS fittings, over-pressure spikes, heat exposure | Replace bulging or cracked hoses immediately; retorque fittings to spec; add abrasion sleeves; reroute away from hot or moving parts |
| Rollers and slide pads | Bin binds during roll-off, metal-on-metal grinding, jerky or uneven travel | Worn rollers or flattened slide pads, seized or dry bearings, contaminated or damaged tracks | Check roller diameter and pad thickness against wear limits and replace when past spec; free up or replace bearings; clean and inspect tracks |
| Control valve and electrical wiring | Function will not respond, intermittent operation, PTO or valve solenoid will not engage | Blown fuse, corroded or loose connectors, chafed wiring, sticking valve spool, low system pressure | Test for voltage at the solenoid, clean and grease connectors, verify grounds, rebuild or replace a sticking spool, confirm system pressure |
| Chassis frame mounts | Cracking at mounting plates, loose mounting bolts, flexing or clunking under load | Frame fatigue, loosened or elongated bolt holes, corrosion, cracked welds | Inspect welds and check bolt torque; replace stretched hardware; gusset and re-weld cracks; treat corrosion before it spreads |
How to Use This Reference in the Field
- Match the symptom, not the part. A bin that binds can be a roller problem, a pad problem, or a bent hook. Confirm the cause before ordering parts.
- Log every repeat failure. If the same hose or mount keeps failing, the root cause is usually routing, alignment, or over-pressure, not the component itself.
- Check wear limits, do not guess. Replace rollers, pads, and hooks by measured spec rather than by feel.
- Treat leaks as urgent. Hydraulic fluid loss on a route is a safety and downtime issue, not a cosmetic one.
Frequently Asked Questions: Hook Lift Bin-to-Chassis Matching and First-Failing Parts
How do I know if my bin size is too large for my chassis length?
Start with two numbers: the hook lift’s rated container-length range and your truck’s cab-to-axle (CA) dimension. A bin is oversized when its rear rail extends beyond the rearmost roller once the front is seated in the front rests. That leaves the tail unsupported and turns the load into a cantilever. Keep the container inside the manufacturer’s published minimum and maximum lengths; that window varies by model, so check the spec sheet rather than assuming. If you have to shove the bin rearward past the last roller to seat it, the setup is too large for the chassis.
What are the first components to wear out on a hook lift truck used daily?
Daily duty produces a predictable wear order, matching the failure chart above: hydraulic cylinders and seals first, then the hook and latch assembly, then hoses and fittings. Rear rollers and their bearings, pivot pins and bushings on the tilt and lift arms, the safety lock, and PTO pump and control-valve seals come next. Container skids and the bin’s front stops also erode from repeated load-and-dump cycles.
How often should hook lift hydraulic cylinders and hoses be inspected?
Run a daily walk-around for chafing, seeping seals, and loose fittings. Complete a full cylinder check (rod condition, pin and bushing wear, pressure test) every 250 to 500 operating hours or monthly, whichever comes first. Replace hoses at the first sign of cracking, bulging, or abrasion, and no later than every 4 to 6 years. Sample and analyze hydraulic fluid annually.
| Component | Daily | 250-500 hrs or Monthly | Annual |
|---|---|---|---|
| Hoses and fittings | Visual leak and chafe check | Pressure check | Replace aged sets |
| Cylinders (rod, seals) | Leak check | Full inspection | Rebuild as needed |
| Pivot pins and bushings | Grease | Wear measurement | – |
| Hydraulic fluid | Level check | Filter change | Oil analysis |
Does a mismatched bin-to-chassis setup accelerate part failure?
Yes, and often dramatically. A bin that is too long or too short shifts weight off the intended fulcrum, raising rear-axle load, changing the tilt geometry, and driving hydraulic pressure above design values. The result is overloaded rollers, stretched pivot bores, cracked frames, and short cylinder-seal life. Even a small mismatch compounds across daily routes.
Can a shorter chassis safely handle a longer container?
Generally no. A container longer than the hook lift’s rated maximum creates rear overhang that overloads the rear axle and reduces steering-axle weight, hurting handling and braking. It also increases frame stress and can exceed GVWR and axle ratings. Safe matching means staying inside the published container-length window and confirming axle loads on a scale before the truck goes into service.
Conclusion
Two decisions determine how well a hook lift truck performs.
The first is matching bin size to chassis length. When container capacity and rail geometry line up with the frame, every lift is stable and predictable. A mismatch – an oversized body on a short wheelbase, or rails that underreach the container – introduces instability, overloads the tilt cylinder, and shortens component life.
The second is prioritizing the parts that fail first on daily routes. Hydraulic cylinders, hook and latch assemblies, hoses and fittings, and PTO and pump systems absorb the heaviest abuse. Inspecting these components on schedule prevents the costly roadside breakdowns that erode uptime.
Configured correctly and maintained on schedule, a hook lift truck protects uptime, safety, and total cost of ownership.