Why Wheelbase Decides the Bin Swap on Narrow Inner City Routes
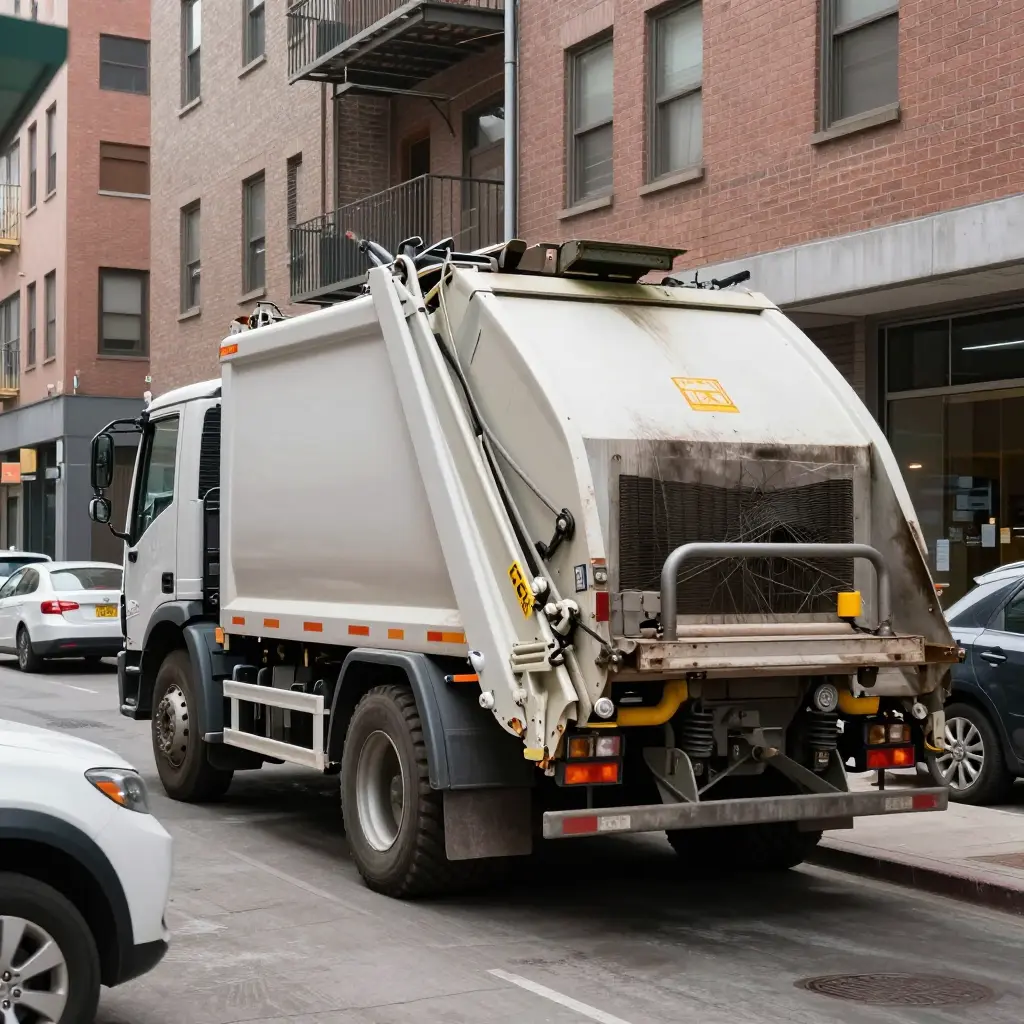
On narrow inner city routes, a skip loader garbage truck’s wheelbase decides whether a bin swap finishes in one movement. A 20-tonne lift capacity is worth little if the truck cannot line up on the bin without repositioning.
A longer wheelbase widens the turning envelope. The rear axle tracks further from the steer axle, so the truck needs more road width to swing the lifting arm onto the bin, and more clearance to pull away loaded. Tight blocks already carry parked cars and kerbside loading zones; the extra metre is usually not there.
So the driver shunts. Forward, back, forward again, until the hook and the bin rail line up. Each shunt runs 20 to 40 seconds and puts another cycle on the clutch, the PTO and the lift cylinder. On a 30-stop route, two extra shunts per stop comes to 20 to 40 minutes a day, which is a full extra collection window. The penalty compounds across a shift instead of staying a one-off delay.
Wheelbase and body length always trade against each other, so confirm the relationship when you spec a chassis (how bin size matches chassis length).
On a fleet you already run, though, rail wear is the measurement to take first. Wheelbase comes off the spec sheet in a minute. Rail wear tells you whether the trucks you own can still hold a bin level through a single-movement swap.
Short wheelbases buy turning envelope, long ones buy rear axle load. The bin swap is where that trade gets paid for.
Wheelbase, turning envelope and bin swap clearance on inner city routes
| Chassis wheelbase band | Approximate kerb-to-kerb turning radius | Typical inner city street fit | Bin swap movements needed | Best route profile |
|---|---|---|---|---|
| Short (3.0-3.6 m) | 14-16 m | Fits alleys and tight right-angle corners | 1; single pull, no shunt | Nimble swaps on cramped blocks, light payload |
| Compact (3.7-4.2 m) | 15-17 m | Most narrow two-lane residential streets | 2; one shunt to square the bed | Tight residential routes, moderate bin weights |
| Standard (4.3-4.9 m) | 17-19 m | Standard lanes, tight at older junctions | 2-3; one or two shunts | Mixed inner city work, balanced axle load |
| Long (5.0-5.7 m) | 19-21 m | Needs a full lane, restricted at tight turns | 3-4; two shunts plus spotter | Wider streets, heavier bins, slower swaps |
| Extended long (5.8-6.6 m) | 21-23 m | Avoids tight corners, needs wide junction geometry | 4-5; three-point turns on tight blocks | Maximum payload, widest envelope, arterial routes |
The movement column is the cost column. Every band added for load distribution sweeps the front corner wider and adds another movement per swap, which is why a long chassis on a narrow block burns cycle time instead of saving it.
Figures are indicative for a straight-frame skip loader with the body fitted. Confirm the turning circle against the manufacturer’s data, and check how bin size should match chassis length before locking a specification.
Bin swap geometry on a confined street
A skip loader never lifts a bin straight up. The hook sweeps it through an arc, so on inner city routes the arc, not the payload, is usually the binding constraint. Three points decide whether a bin swap is one movement or a reverse-and-retry.
Approach angle from the kerb line
The hook needs a working line of roughly 10 to 20 degrees off the kerb: enough to keep the bin body clear of the rails during pickup, without swinging the rear over the opposite lane. A shorter wheelbase buys that angle inside a narrower slot. Cable and hooklift bodies tolerate different approach offsets, which is why the hoist type comparison is worth settling before chassis selection.
The transfer arc over the rails
The hook lifts, the bin pivots on the rear rollers, and the body rolls forward until it clears the rail tips. Arc radius is fixed by jib length and hook height, and it cannot be adjusted at the kerb. Set the jib too steep and the bin nose fouls the rail entry; too shallow and the lift stalls. The jib angle and rear axle load relationship explains how that angle trades lift clearance against axle loading.
Alignment tolerance at rail entry
Rail entry carries the tightest tolerance in the cycle: typically 50 to 100 mm of lateral margin before the rollers climb a rail edge instead of seating in the channel. Anything inside that window is a single-movement stop.
What a re-approach costs
A truck that cannot complete the arc in one movement has to stop, reverse and re-align. That costs route minutes immediately and roller and rail contact wear later.
| Re-approaches per stop | Added route minutes (60-stop route, 20-40 s each) | Extra roller/rail contact cycles |
|---|---|---|
| 1 | 20 – 40 | ~60 |
| 2 | 40 – 80 | ~120 |
| 3 or more | 60 – 120 | 180+ |
Each extra cycle loads the rail lip and roller face at the same two contact points, so rail cracking and roller flat-spotting arrive sooner in the maintenance interval, not later in the truck’s life. Measure rail edge wear and roller diameter on the trucks that regularly double-approach; that reading, not odometer hours, sets the inspection interval.
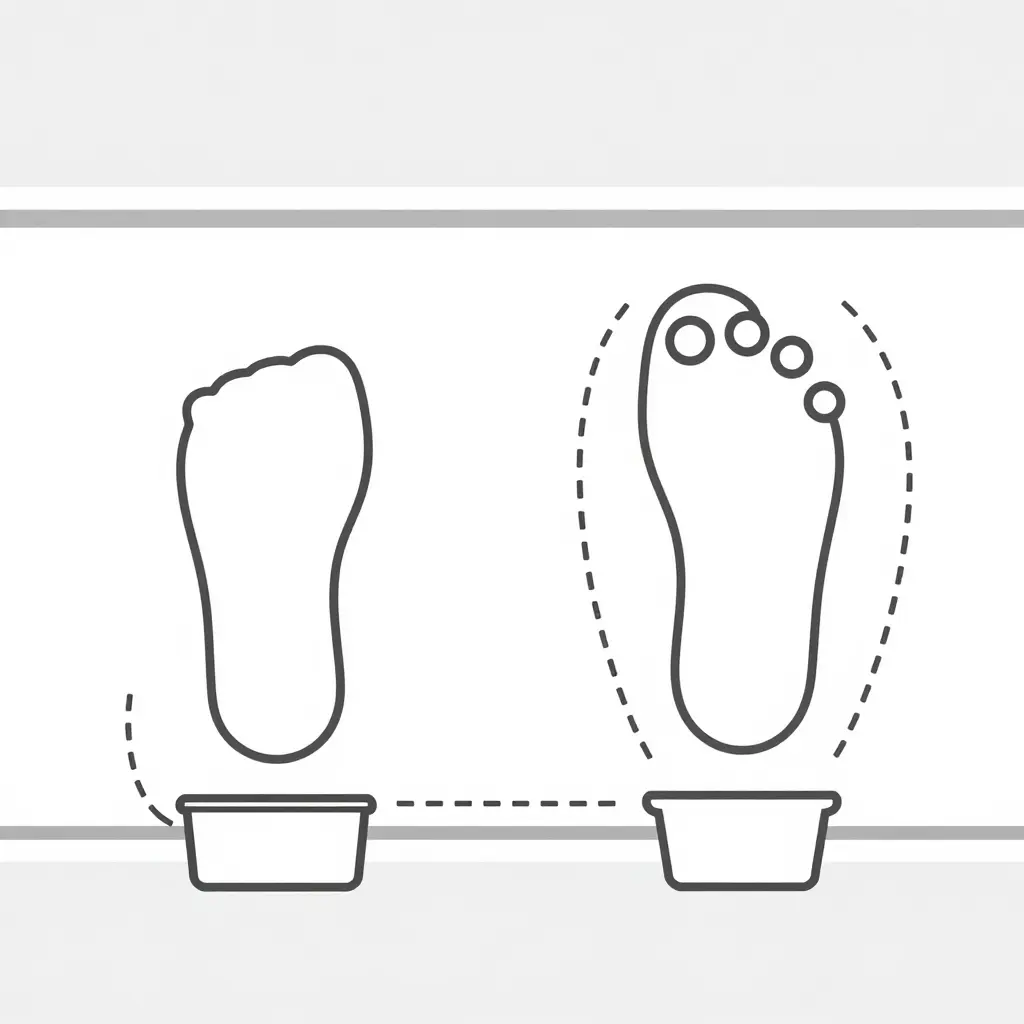
What the Diagram Shows
The left panel is the short-wheelbase chassis: one shallow dashed arc, and the bin lands on the rear rails first time. In the right panel the long-wheelbase truck sits further from the kerb at the rear rail entry, so the arc has to be run again, and on tight blocks that repetition is where extra movements and rail wear come from. For how those repeated cycles compare across body types on a single-driver route, see how hooklift and cable hoist units compare when swapping bins on tight city blocks.
Rail Wear Inspection: What to Measure First
On a used skip loader garbage truck being audited for narrow inner city work, start with the rails. Rail wear comes before payload is tested, before lift rating is verified and before hydraulic condition is assessed, because a worn rail quietly corrupts every number you take afterwards: a bin that sits skewed on a damaged rail will read heavy at the hook, drag on the rollers and load the cylinder unevenly.
Check the rails in this order
1. Rail straightness and rail-to-rail parallel distance. Check straightness over the full length, then measure the parallel distance between the two rails at the front, middle and rear. If the rails have spread or pinched, the bin binds halfway through the bin swap and the driver ends up rocking the truck to force it home on a tight street.
2. Wear depth at the rail top face and inner flange. Use a straight edge and depth gauge on both surfaces, comparing left against right. A worn top face lets the bin drop and chatter as it slides; a worn inner flange lets it walk sideways into the kerb-side rail during a narrow-lane swap.
3. Roller and guide wear on the bin. Measure roller diameter and guide clearance on the bins that will actually run this route. Oversized clearance turns every swap into a shove-and-hope exercise, and it accelerates rail wear on the truck side at the same time.
4. Hook and pivot wear. Check hook throat wear, hook straightness and pivot pin clearance. A hooked-out throat lets the bin ride forward under braking, and the driver loses the plumb line that keeps the bin inside a tight turning envelope.
5. Frame rail cracking at the rail mounting points. Inspect every mounting foot, web and weld for hairline cracks, and treat any crack as a structural stop rather than a cosmetic note. Cracks here mean the lifting loads are no longer reaching the chassis cleanly, and a bin swap on a crowned inner city camber can open them fast. For a deeper walkthrough, read about hidden frame rail cracks on used hook lift trucks.
Read the wear pattern, not just the number
Uneven wear at the front rail section is a behavioural tell. It signals repeated partial entry during tight maneuvering, where the driver stops short of full engagement, backs off and re-enters. On a route with narrow blocks and parked cars that pattern shows up quickly, and it usually points to a wheelbase or approach-angle mismatch rather than driver error.
Only once rail wear readings are recorded should you move on to payload figures, lift rating and hydraulic condition. That handover point is where the subframe and lift cylinder checks take over.
Rail wear points to measure before the next bin swap
Print this list and hand it to the inspector before the next swap. Ten minutes with a gauge beats a failed lift on a narrow street, and it pairs with these checks for hidden frame rail cracks on older units.
- Rail top-face wear – straight edge plus feeler gauge; act when the dished groove passes 3 mm.
- Inner flange wear – caliper at the hook contact zone; act when thinning exceeds 10% of original thickness.
- Rail parallelism – laser level or string line; act when the gap varies over 3 mm end to end.
- Rail-to-frame welds – magnifier and dye penetrant; act on any crack, undercut or rust bleed.
- Roller diameter on the bin – outside caliper across the tread; act below the maker’s minimum service diameter.
- Hook throat wear – hook gauge or caliper; act when the throat loses 10% of rated depth.
- Pivot pin clearance – dial indicator or feeler gauge; act on visible play above 0.5 mm.
- Stop-block contact – feeler gauge under load; act when the block no longer seats flat.
Record every reading with the date and bin number, so trends show up before a single point fails.
Rail wear depth by rail section and route type
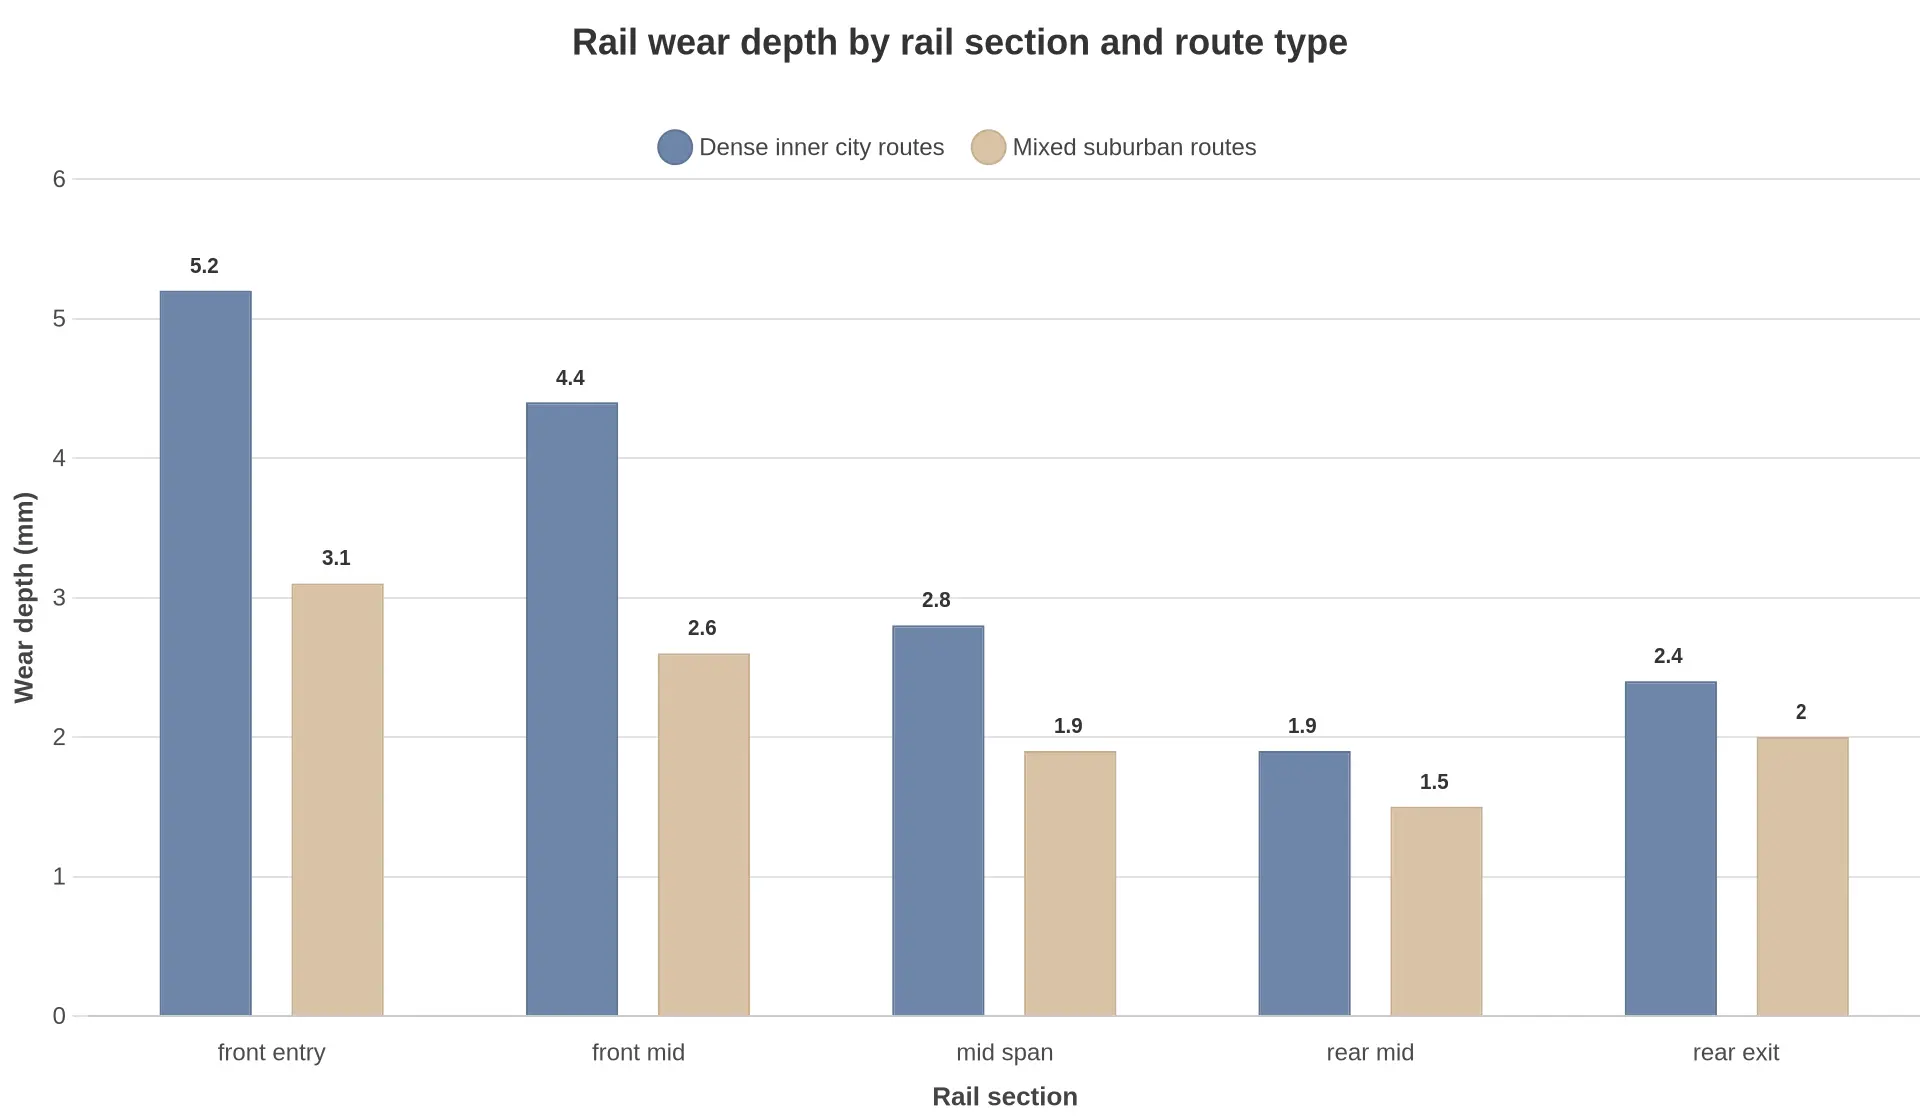
The chart above compares measured rail wear depth across five frame sections on two route profiles: tight inner city work with frequent short-wheelbase maneuvering, and mixed suburban work with longer runs between stops.
What the pattern tells you
- Front entry is the hot spot, not the rear. On dense inner city routes the front entry section reaches roughly 5.2 mm, more than double the 2.4 mm measured at the rear exit. Repeated re-approach during the bin swap loads the same front zone again and again before the hook ever takes weight.
- Wear trails off toward mid span. The 2.8 mm at mid span is broadly normal for the tonnage carried, which suggests the front readings tell a maneuvering story rather than an overload story.
- Suburban routes flatten the curve. Mixed suburban work shows a gentler 3.1 mm at front entry and much smaller gaps between sections, because the driver lines up once and lifts once.
How to use these numbers
Record your five sections with a depth gauge at the same marked points at every rail check, monthly where re-approaches are common, then watch the front entry trend rather than the total. A front-to-mid span ratio above about 1.8 on your own trucks is the early warning that re-approach cycles are being paid for in steel, and it is where hidden frame rail cracks tend to start on used units. Measure before you reinforce, and let the fastest-wearing section set the inspection interval.
The Buying Rule: Spec the Route, Not the Catalogue Default
On narrow inner city routes, the wheelbase should be the shortest figure that still carries the required axle load and body length for your bin sizes. No shorter, because you lose load stability. No longer, because every extra inch of wheelbase is turning circle you cannot buy back at the kerb.
Lock that dimension first, then build the rail specification around measured duty: rail section thickness and rail support spacing sized to your actual lift cycles and bin weights, not to a catalogue default that assumes a gentler route than yours. A skip loader garbage truck specced this way keeps the swap clean and the rail wear predictable. Sizing guidance for the body-to-chassis interface is in this garbage tipper truck manufacturer China sizing guide.
Two numbers for the finance conversation
Keep that conversation in hard figures, not opinions:
| Number to record | How to log it | What it justifies |
|---|---|---|
| Route minutes lost per bin swap | Time each swap from approach to drive-away, per street type | The shorter wheelbase and tighter turning envelope |
| Rail replacement interval | Cycles or months between rail changes, with photos of wear depth | The heavier rail section and closer support spacing |
Tracked for a few weeks, those two numbers turn a spec argument into a cost-per-route calculation, and they pair with the wear signals described in this guide to PTO hours and hydraulic pump wear before you bid.
One more safeguard worth writing into the order: units built under a controlled quality system and delivered as factory-built special vehicles carry far less risk of rail alignment variance at handover than chassis converted in scattered workshops.
Before signing, verify the wheelbase against your tightest turning point and the rail schedule against your logged swap times.
Frequently asked questions
How does wheelbase affect the bin swap on narrow inner city routes?
A short wheelbase keeps the rear axle close to the steering axle, so the truck pivots in a tighter arc and the bin stays inside the lane during the lift. A long wheelbase pushes the tail swing outward, which forces the driver to stop, reposition and take a second approach before the bin swap lines up. On tight blocks, the shorter chassis completes the swap in one continuous motion. See matching bin size to chassis length for the sizing rules.
Can a longer wheelbase be corrected with steering or reversing practice?
No. Steering technique cannot change the physical turning radius or the tail swing arc, so practice only shortens the setup time, not the space required. Reversing into the pick-up point helps on some blocks, but it does not recover the clearance a long wheelbase takes away.
How often should rail wear be measured on a skip loader garbage truck?
Measure rail wear every 250 operating hours and at every scheduled service interval, whichever comes first. Trucks working tight city routes with frequent short bin swaps should be checked monthly. Record top-face and side-face depth at the same three points each time so the trend is comparable.
What wear depth on the rail top face calls for rail replacement rather than rewelding?
Replace the rail when top-face loss reaches 3 mm, or when the inner flange has lost more than 10 percent of its original thickness. Localized gouges and scoring under those limits can be rebuilt by welding and ground back to profile. Once the loss is uniform along the length, welding only adds heat and distortion to a rail that has already lost its section.
Does rail wear change the safe rated lift capacity of the bin swap?
Yes. Worn rails shrink the contact area that carries the bin, so the rated lift capacity has to be derated to match the remaining rail section. A skip loader garbage truck with rails past the replacement limit cannot safely complete a full-load bin swap at its nameplate rating. Restore the rail profile before returning the truck to rated capacity.