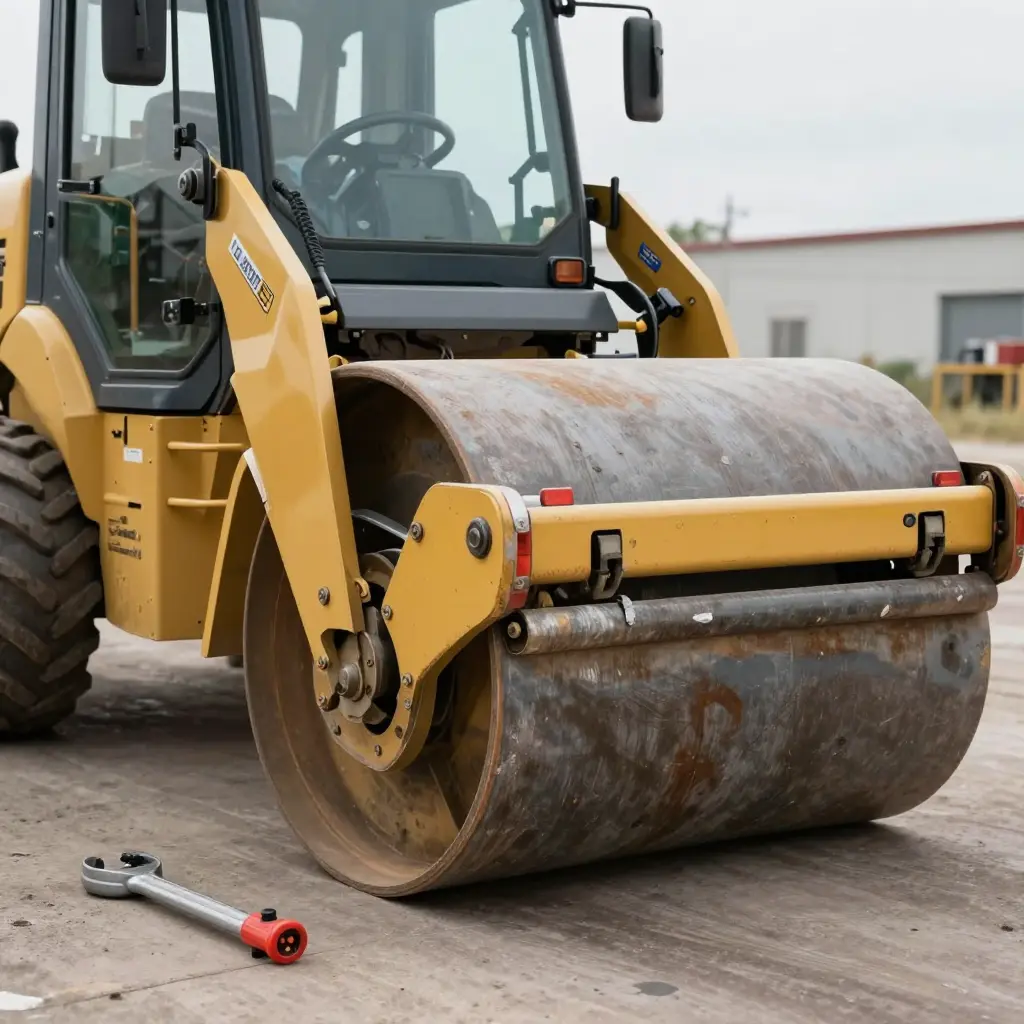
A packer floor usually shows its condition long before it fails. Most of the warning signs are the same ones tied to why the body floor rusts through before anything else, so inspectors should look for them on every walkaround:
- Visible plate thinning along the sweep path, where the compaction blade rides the floor.
- Pitting or surface cratering that snags a rag or a gloved hand.
- Weld cracking at the hopper seam, especially where the floor meets the side wall.
- Exposed reinforcement ribs showing through the worn floor plate.
- Floor deflection or oil-canning under a loaded blade pass.
- Rust staining streaking around fasteners, bolt heads, and mounting plates.
- Gaps opening at floor-to-frame stitch welds.
- Standing water pooling in depressions where the plate has dished.
Two or three of these signals together usually mean it is time to measure remaining plate thickness before the next route cycle, not after the next breakdown.
Packer Floor Thickness Measurement Reference Table
A wear map means little without pass/fail numbers to compare against. Read each grid point with a calibrated ultrasonic thickness (UT) gauge at every inspection interval, then check the value against the thresholds below to decide whether to monitor, reinforce, reline, or scope a replacement body.
| Measurement Point | Original Plate Thickness (mm) | Minimum Service Thickness (mm) | Recommended Action |
|---|---|---|---|
| Hopper transition | 6.0 | 4.0 | Reinforce with a doubler plate; this zone cracks first under wet, dense commercial loads |
| Mid-floor sweep zone | 6.0 | 3.5 | Reline; constant blade abrasion thins this zone fastest along the centerline |
| Rear discharge floor | 8.0 | 5.0 | Monitor each interval; reinforce if pitting or under-blade gouging exceeds 1.5 mm |
| Side wall lower band | 4.5 | 2.5 | Evaluate for a body swap; once this band is gone, the side sheets usually are too |
These figures are practical field guidance only – the final liner specification always depends on your actual duty cycle, material density, and OEM tolerances.
For the failure mechanics behind the hopper-transition row above, review why wet commercial bins crack the hopper floor and the plate thickness to specify next time.
How to Measure Packer Floor Wear: A Step-by-Step Procedure
Packer floor wear rarely announces itself. By the time an operator notices a soft spot, a drip, or a blade that no longer sweeps clean, the plate may already be too thin to justify another reline, which is when the conversation turns to a body swap. Consistent measurement – the same points, the same method, every interval – is what keeps that repair decision grounded in data instead of guesswork. Because the floor often rusts from the inside out, understand why the body floor rusts through first before you take your first reading.
Run this procedure at every scheduled inspection so the numbers stay comparable over the life of the truck.
-
Clean the plate to bare metal. Wire-brush or grind each measurement zone until rust scale, coatings, and packed debris are gone. Ultrasonic signals do not travel reliably through loose scale, so a dirty plate yields false readings.
-
Establish fixed reference grid points. Lay out a grid across the packer floor – 12-inch (300 mm) squares work well – and mark each intersection with a paint pen or center punch. Record every point relative to fixed features such as the hopper, hinge pin, and side rails. These coordinates never move.
-
Measure the plate in place with an ultrasonic thickness gauge. Apply couplant, calibrate against a known step block, and take at least three readings at each grid point. Average them to smooth out surface variation.
-
Confirm accessible areas with calipers or a pit gauge. At exposed edges, cut-outs, or where a liner has been removed, verify the ultrasonic numbers with a physical measurement. Cross-checking keeps the electronic gauge honest.
-
Record every reading against its grid coordinate. Log the value, the date, and the machine hours. A reading without a location and a timestamp tells you nothing about wear rate.
-
Compare against original plate thickness. Subtract the current reading from the original spec to find material lost, then express it as a percentage. That figure drives the reline-versus-replace call.
-
Repeat at the same grid points each interval. Sampling identical coordinates turns isolated numbers into a wear-rate trend measured in millimeters per year. That trend, not a single snapshot, tells you how much service life the floor still has.
Measure the same way, at the same points, on the same schedule, and your packer floor wear data becomes a forecast you can plan a repair around.
Reading the Curve: Why Wear Is Predictable
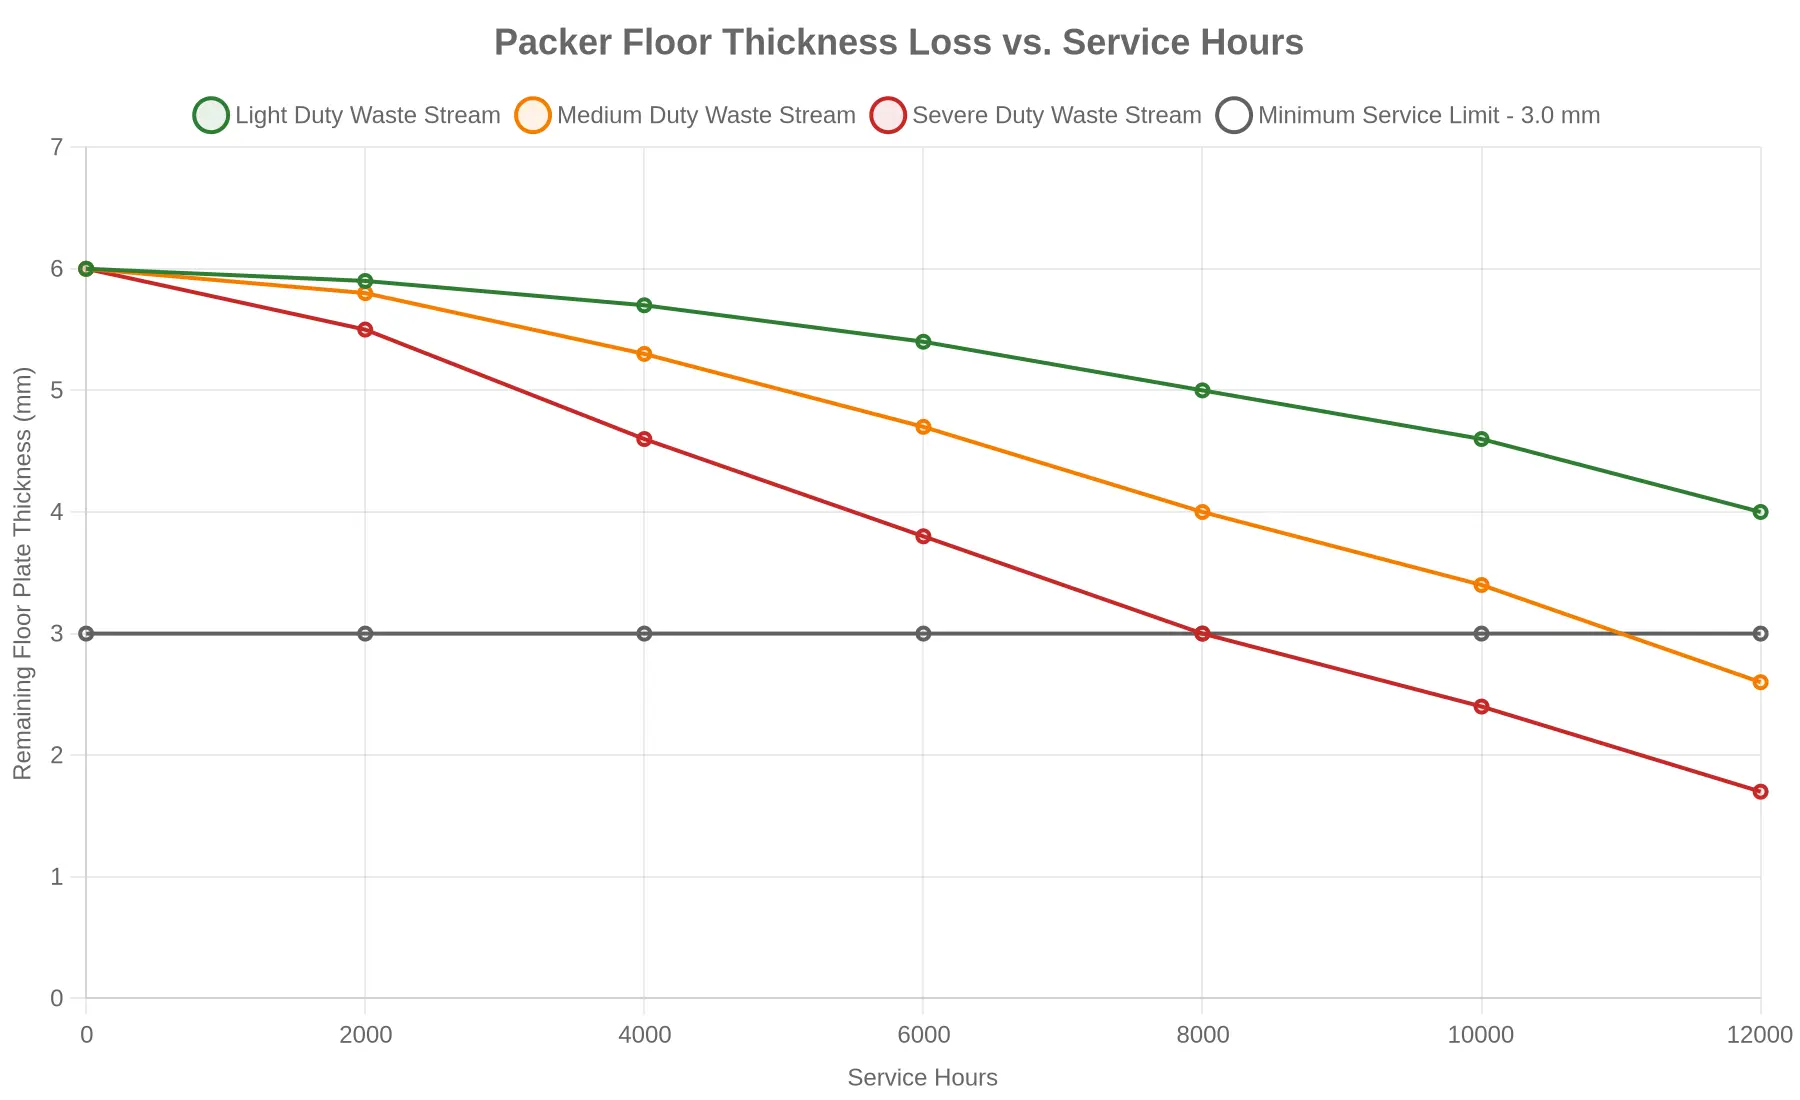
The chart plots remaining floor plate thickness (mm) against service hours. Packer floor wear is not random: it accumulates at a measurable rate. All three duty cycles begin with the same 6.0 mm plate and diverge according to what the truck actually hauls.
- Light duty (residential, low-moisture, low-abrasion) holds above the limit well past 10,000 hours.
- Medium duty (mixed commercial, moderate wet content) crosses the 3.0 mm minimum service limit near 9,000 hours.
- Severe duty (wet commercial bins, construction debris, abrasive grit) punches through the limit near 6,000 hours – often before the truck has finished its first major overhaul cycle.
The dashed reference line is the diagnostic threshold. Once you know where your truck sits on this chart, you can forecast when relining pays for itself and when a body swap becomes unavoidable.
For a deeper look at why wet, high-moisture loads accelerate this curve so aggressively, see our breakdown of why wet commercial bins crack the hopper floor and the plate thickness to specify next time.
Specifying Liner Thickness That Avoids a Body Swap
On a rear loader compactor relining job, the liner thickness you choose decides whether you buy years of service or merely delay an inevitable body swap. The floor liner is sacrificial; the structural base plate beneath it is the part you cannot afford to lose.
A standard 3/16 in liner plate leaves only a thin wear allowance before the base plate is exposed to abrasion and moisture. Step up to a 1/4 in liner and you nearly double that allowance, so the base plate stays above its minimum service thickness for far longer. The heavier gauge costs more today, but it pushes the replacement interval out by years.
| Specification point | Standard liner (3/16 in) | Upgraded liner (1/4 in) |
|---|---|---|
| Wear allowance above base | About 1/16 in | About 1/8 in |
| Base plate protection | Thin margin, quick exposure | Keeps base above minimum service thickness |
| Typical reline interval (heavy duty) | 3 to 4 years | 6 to 8 years |
| Best use case | Light residential routes | Wet, heavy commercial tonnage |
Three variables interact here. Liner thickness sets the total material budget. Wear allowance is what remains after each duty cycle grinds into the surface. Duty cycle – route tonnage, wet loads, and compaction pressure – sets how fast that material disappears. On wet, heavy routes, the same forces that crack hopper floors when plate thickness is underspecified can wear a light liner through in a single season.
Track measured base-plate thickness at every inspection. Once cumulative wear has consumed the liner and is closing on the base plate’s minimum service thickness, relining no longer protects the structure; it only buys a short window before the base itself fails. At that stage, rear loader compactor relining becomes uneconomic, and a body swap is the better decision.
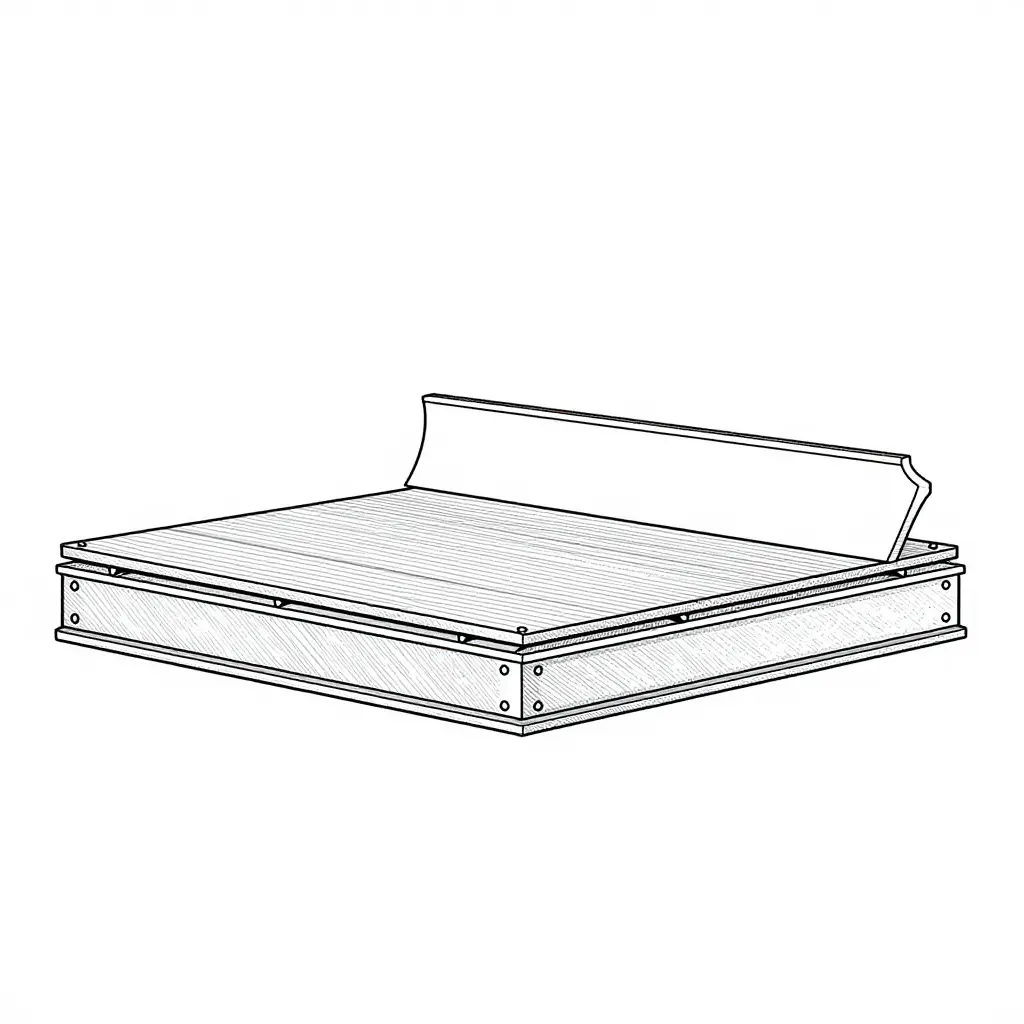
Schematic cross-section of the packer floor stack. The heavy structural base plate sits at the bottom, topped by a thinner sacrificial wear liner held in place with edge welds and countersunk fasteners. The curved arrow above shows the packer blade sweep path that abrades the liner surface during every cycle.
The blade rides on the replaceable liner, not on the body itself. When wear reaches the liner’s limit, cut it free and weld on a fresh one – the structural base plate underneath never loses section. So relining preserves the body structure rather than forcing a full body swap.
Selecting Liner Plate Material and Steel Grade for Rear Loader Compactor Relining
When you reline a rear loader compactor, the liner plate and steel grade you select decide how long the packer floor, body floor, and side walls survive the abrasive grind of daily compaction. Spec the wrong material and you will be back under the truck welding within a season; spec it right and a single liner can outlast a set of packer blades.
Abrasion-Resistant Grades vs. Mild Steel
Mild steel such as A36 is inexpensive and welds easily, which is why manufacturers rely on it for structural members and body framing. As a wear liner, though, it is soft. Abrasion-resistant (AR) plate – most commonly AR400, AR450, and AR500 – is quenched and tempered to a high Brinell hardness, so it resists gouging and sliding abrasion far better than mild steel at an equivalent thickness.
Hardness, Thickness, and Weldability
Hardness (measured in BHN) drives wear life, and it also drives weldability. The harder the plate, the more sensitive it becomes to heat input, so an AR liner demands a controlled weld procedure with preheat, interpass temperature limits, and a matching low-hydrogen filler. Mild steel forgives sloppy technique; AR500 does not.
| Material | Typical Hardness (BHN) | Abrasion Resistance | Weldability | Best Suited To |
|---|---|---|---|---|
| Mild Steel (A36) | 120-150 | Low | Excellent | Light residential streams, low-contact zones |
| AR400 | ~360-440 | High | Good with care | Mixed municipal solid waste |
| AR450 | ~425-475 | Very High | Moderate | Heavy commercial and wet loads |
| AR500 | ~470-540 | Excellent | Demanding | C&D debris, grit, glass, metal scrap |
Matching the Grade to the Waste Stream
Waste composition is the deciding variable. A dry residential route packs paper and film, so moderate-hardness AR400 keeps costs sane. Commercial routes hauling wet food waste, glass, and grit punish the floor harder, justifying AR450 and a heavier gauge – the same logic that governs the plate thickness to specify next time. C&D and demolition streams carry rebar, concrete chunks, and tile, driving specifiers to AR500 liners even though the welding is unforgiving.
The Manufacturer’s Role
Reputable equipment builders deliver durable, reliable compaction equipment under a documented quality system: verified base-metal chemistry, traceable heat numbers, and documented weld procedures. That discipline is what separates a liner that survives five years from one that cracks at the first impact. Buy your plate and your procedure from sources that can prove the steel is what it claims to be.
Cost Comparison: Relining vs. Compactor Body Swap
Once you have confirmed that your rear loader’s floor wear is still confined to the plate surface and the base structure underneath is sound, the decision stops being an emotional one and becomes an accounting one. A correctly specified reline touches only the parts that have actually worn – the floor plate, and the seams around the hopper where abrasive wet commercial waste does its damage. A body swap throws away the entire shell, the reinforcing members, the tailgate alignment and every bracket that is still perfectly serviceable.
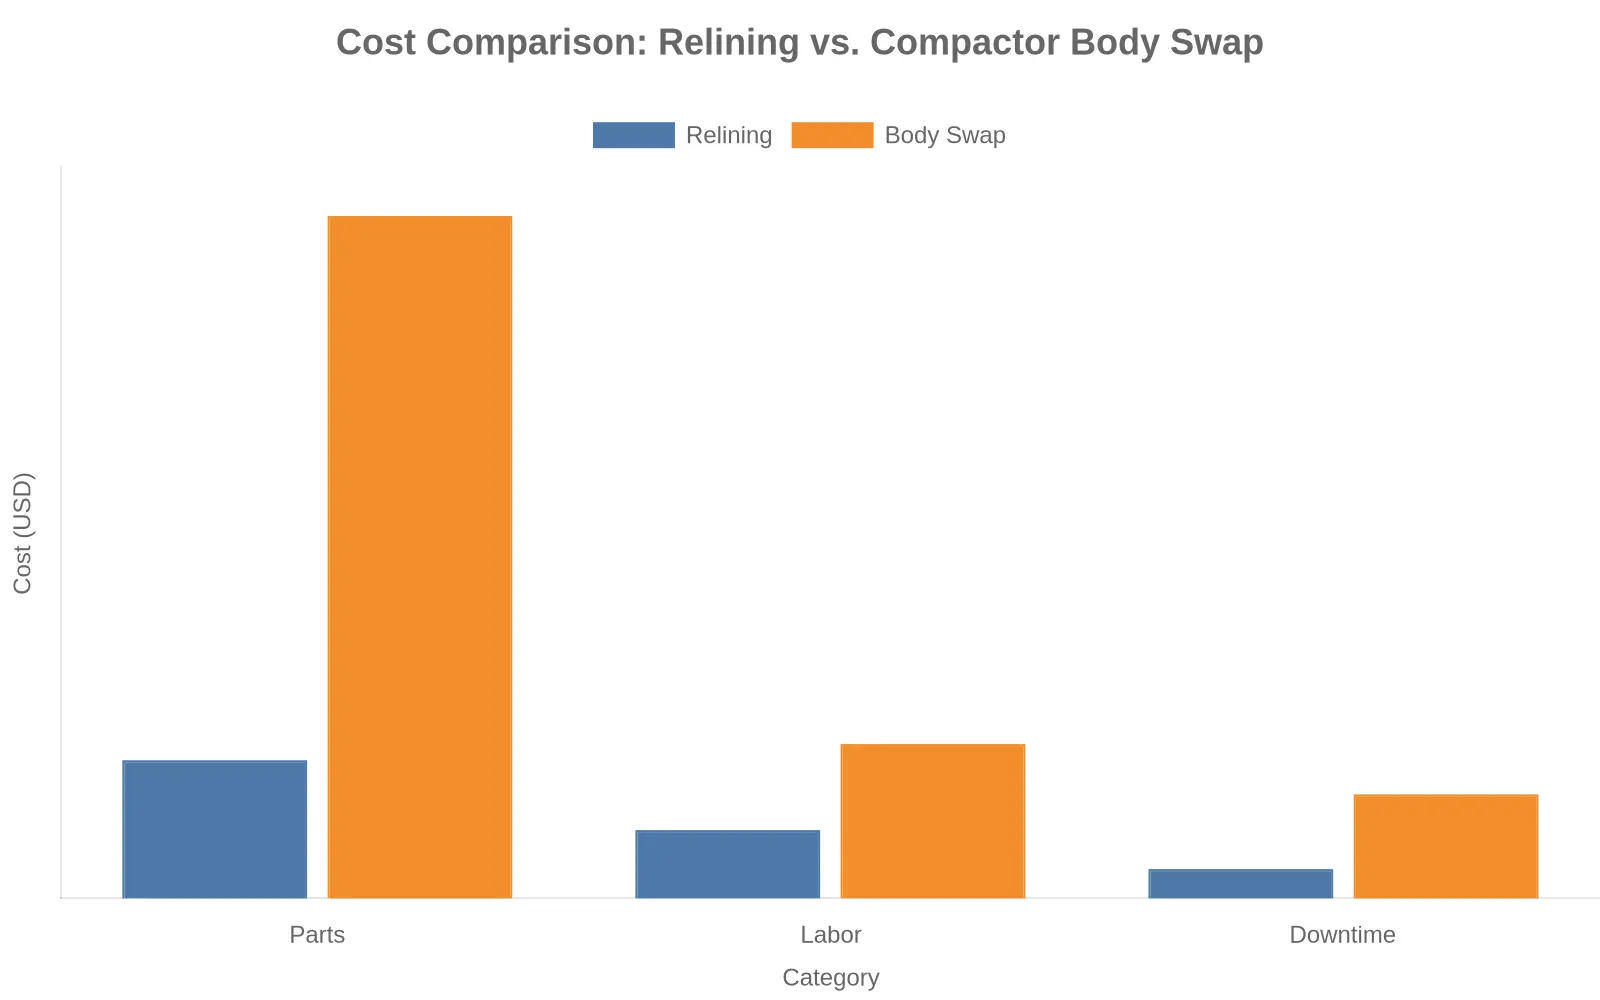
The grouped bars above break the cost into three categories fleet managers actually budget against – parts, labor and downtime:
| Category | Relining | Body Swap |
|---|---|---|
| Parts | $8,500 | $42,000 |
| Labor | $4,200 | $9,500 |
| Downtime | $1,800 | $6,400 |
Why the gap widens beyond the parts invoice
The parts line is the obvious one – a plate and consumables versus a complete compactor body. But the honest cost of a body swap lives in the two lines nobody quotes up front. Labor climbs because the shop unbolts, lifts and re-plumbs an entire assembly rather than welding in a liner. Downtime climbs faster because a body swap pulls the truck out of the route for a week or more, forcing you to either rent a spare unit or short a route. A reline, by contrast, is often a planned 2 to 3 day job that a competent shop can schedule around your weekly pickups.
That is why reading floor wear properly before you commit matters. When ultrasonic thickness readings still show healthy metal in the base structure – and the wear is a thinning plate rather than a cracked or rotted frame – spending body-swap money is simply not justified. Relining buys you another full service cycle at a fraction of the capital outlay. If you want to understand precisely how plate thickness and seam condition should be specified for the next reline, this breakdown of hopper floor plate thickness and what to specify is worth reviewing before you sign any work order.
The takeaway
A reline is the lower-cost path every time floor wear has not compromised the base structure. Reserve the body swap for the case it was designed for – structural failure – and you keep trucks in service, routes intact, and budget in the bank.
Frequently Asked Questions: Rear Loader Packer Floor Wear and Relining
How often should packer floor wear be measured?
Establish fixed datum points along the hopper and body floor, then gauge them with an ultrasonic thickness tester at every scheduled PM interval – monthly on municipal and commercial routes that exceed roughly 800 compaction cycles per day, and quarterly on lighter residential routes. Always log each reading against a baseline so you are tracking the wear rate, not just the current number.
What minimum liner thickness avoids a body swap?
Any liner thickness choice should leave structural base metal behind when the liner itself is finally worn out. As a practical floor, do not specify a liner thinner than 1/4 in (6 mm), and use 3/8 in (10 mm) or heavier where the original plate has already dropped below 3/16 in (4.8 mm). A liner only earns its keep if enough sound base plate remains underneath to carry the load; if the floor is holed or cracked through, a thin liner just bridges the damage.
Can a worn floor be relined without removing the body?
Yes, in most cases. Field relining is performed by welding new liner plate over a prepared base floor while the body stays mounted on the chassis, provided the welder has access and the base plate is still sound enough to accept the weld loads. The body is pulled only when the floor, cross members, or side sills are themselves structurally compromised. For guidance on how plate spec drives that call, see the plate thickness to specify for high-wear hopper floors.
What signs show the floor wear has gone too far for relining?
Punch-through holes, longitudinal cracks that run beneath the cross members, visible sagging between supports, oil-canning when the blade sweeps, and base plate readings below about 1/8 in (3 mm) all point to base metal that has lost its load path. At that stage a liner simply transfers stress into weakened steel, and the correct fix is a full floor replacement or a body swap – not another overlay.
How does duty cycle affect relining intervals?
Relining intervals scale with compaction cycles and waste abrasiveness far more than with calendar time. A high-cycle residential rear loader handling wet, gritty waste can wear through a floor several times faster than a low-cycle commercial unit running the same chassis. Track cycles and waste type, and set your reline trigger by remaining thickness rather than by the calendar.
The Decision Framework: Reline First, Swap Only When Structure Fails
A rear loader compactor rarely fails all at once. The packer floor wears gradually, and that wear is measurable. Three linked readings have driven the maintenance decision throughout this guide: how to interpret packer floor wear, how to measure it reliably, and the liner thickness that keeps a worn floor serviceable without forcing a costly body swap.
The routine that follows is an if-then sequence.
Step 1 – Measure the base plate, not the liner. Take repeat readings at the highest-wear zones: the floor beneath the packer blade and the forward section where abrasive, wet loads concentrate. Record the lowest remaining value, because that number governs the decision.
Step 2 – If the base plate thickness is still above the minimum structural threshold, reline. A sound body shell behind a worn wear surface is exactly the case for a new liner. Specifying the correct hopper floor plate thickness restores the sacrificial layer and returns the floor to service. This is the lower-cost, lower-downtime path, and it defers any capital outlay on a new body.
Step 3 – If structural thickness is compromised, evaluate a body swap. When the base plate itself – not just the liner – falls below minimum, shows through-cracks, or deforms under load, welding another liner over failing structure only conceals the problem. At that point, a replacement body or a full unit assessment is the responsible decision.
The rule holds: reline while the structure still carries load, replace it once it does not. Regular thickness checks keep that line visible and turn a sudden, unplanned failure into a scheduled repair.
When relining or replacement is due, CRRC’s special vehicle manufacturing capability delivers durable sanitation and garbage truck equipment built to specification. Fleet managers can source bodies and rear loader compactor assemblies engineered around real route demands and extended service life.